How to Plan & Scout Epic Night Sky Photos (Before You Leave the House)
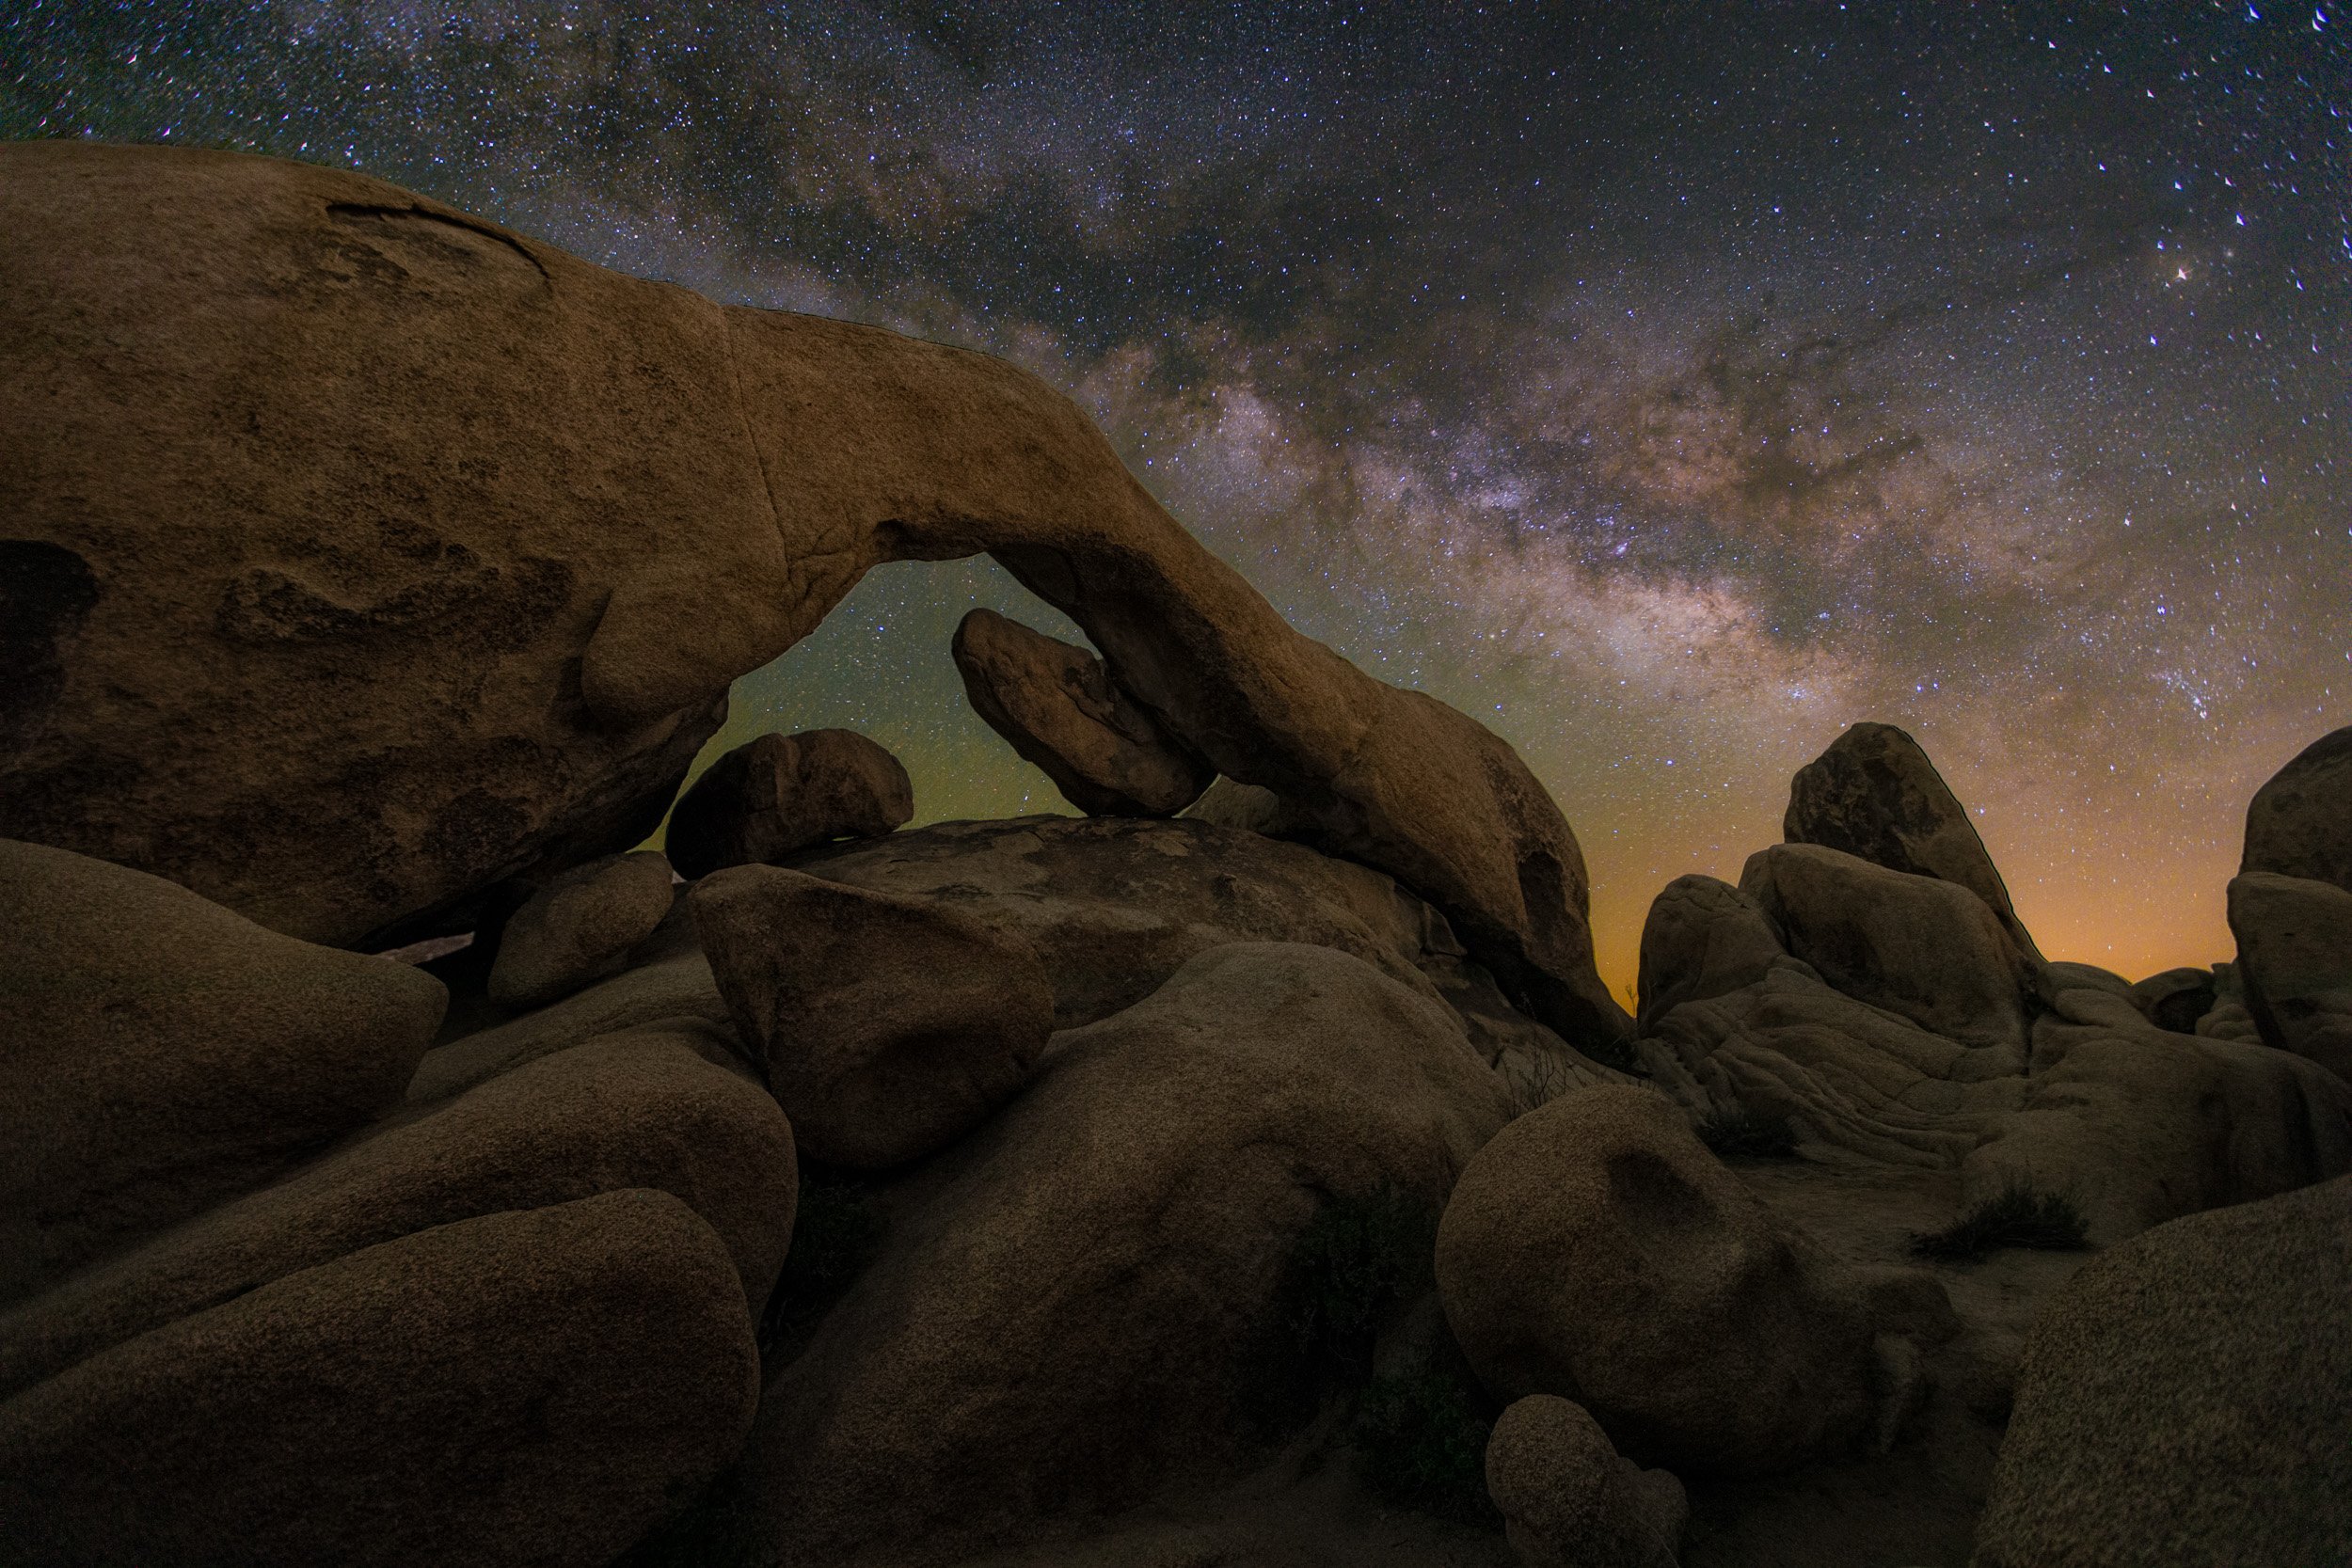
Arch Rock, Joshua Tree National Park — Planning ahead allows you to line up low-angle galactic core trajectories with iconic foreground features.
Have you ever packed up your camera gear, driven three hours out to a dark-sky location, stepped out of your car, and immediately realized the moon was blindingly bright—or worse, the core of the Milky Way was hidden directly behind a massive mountain ridge?
Capturing fine-art astrophotography isn't just about what happens after you hit the shutter button. In fact, 80% of a successful night sky image happens before you ever turn the key in your ignition.
When you're shooting in pitch darkness, guessing your composition or relying on luck is a recipe for frustration. To consistently walk away with tack-sharp, well-composed astro-landscapes, you need a repeatable framework for planning, scouting, and forecasting your shots long before you step foot in the field.
1. Track Galactic Core Windows & Moon Timing
The single biggest myth in astrophotography is that you can only shoot during an exact New Moon. If you restrict your trips to just one or two calendar nights a month, you are leaving incredible shooting opportunities on the table.
You can capture stunning, contrast-rich Milky Way photos up to a week before or after a New Moon—provided you align your trip with the moon’s rising and setting times relative to the core's position in the sky.
Finding Your "Moonless Windows"
The key isn't the moon phase itself; it's whether the moon is actually above the horizon during the specific hours the core is visible. In the Northern Hemisphere, the Milky Way core isn't visible year-round, and its position shifts dramatically as the seasons progress. Because of this, your ideal dark-sky window flips throughout the year:
Early Spring (Pre-Dawn Shooters): In spring, the galactic core doesn't rise in the southeast until the middle of the night (around 2:00 AM to 5:00 AM). You can easily shoot several days after a New Moon (Waxing Moon) because the crescent moon sets early in the evening, leaving the pre-dawn sky completely pitch-black when the core appears.
Late Summer & Autumn (Post-Sunset Shooters): By late summer, the core stands nearly vertical in the southwest the moment astronomical twilight ends (when the sun dips 18° below the horizon). You can shoot several days before a New Moon (Waning Moon) because the moon won't rise in the east until late at night or early morning, giving you a dark post-sunset window.
Using Moonlight as a Natural Softbox
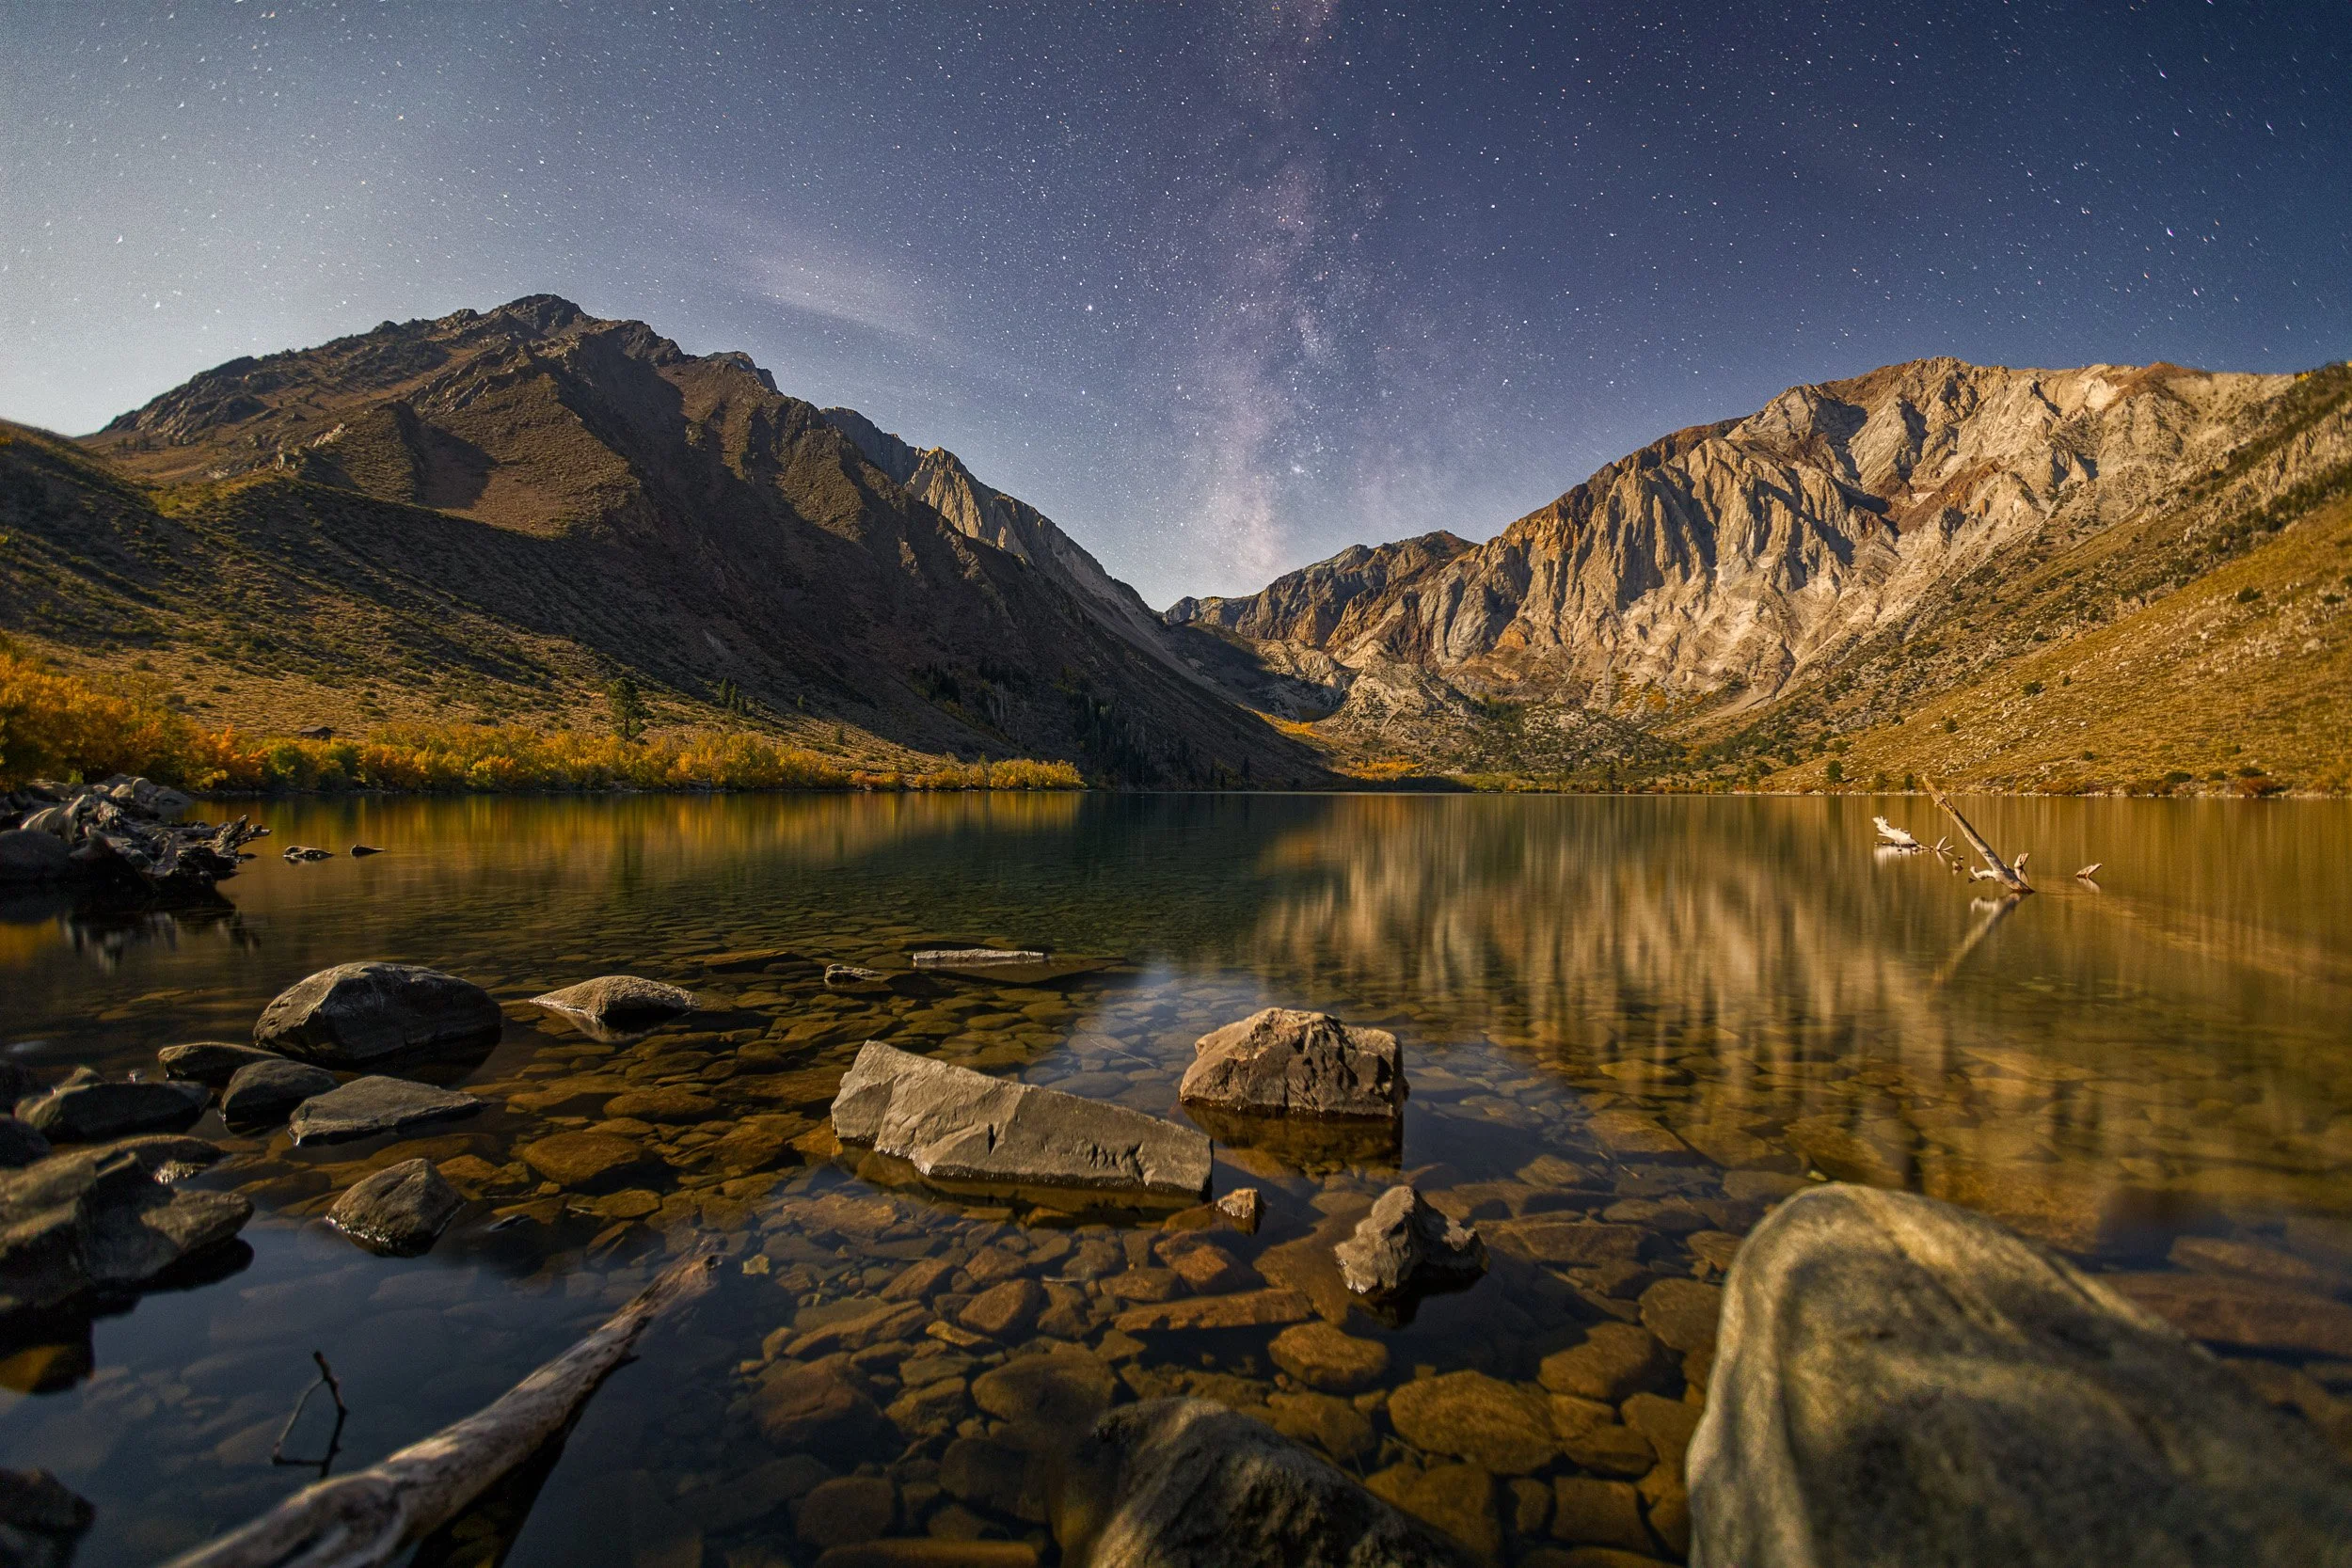
Convict Lake, Eastern Sierra — A low moon acts like a giant softbox, illuminating foreground rocks and fall foliage while keeping the sky dark enough for stars.
Don't fear a little moonlight! A 10% to 25% crescent moon hovering low near the horizon can be your best tool in the field. While a full moon drowns out faint stars and turns the night sky washed-out blue, a slender crescent acts like a giant, soft directional studio light. It paints natural color and dimension into your foreground—eliminating mud-black silhouettes—while leaving the sky dark enough for the galactic core to pop.
To artfully use moonlight without ruining the night mood, keep these three field rules in mind:
Position the Moon for Cross-Lighting: Never shoot directly into the moon. You want it acting as a side-light or rim-light for your foreground landscape. In early spring, when the core is in the southeast, look for a moon setting behind you in the west. In late summer, as the core shifts southwest, a moon rising in the east provides perfect side-illumination.
Catch the "Lunar Golden Hour": Just like daylight photography, the most flattering moonlight occurs during its first or last hour near the horizon. High-angle moonlight feels harsh and unnatural, but low-angle moonlight rakes gently across the terrain, carving out soft micro-shadows and rich rock textures.
Keep It Subtle: The goal isn't to blast your foreground so brightly that it looks like a daytime image. Aim for just enough low-level ambient light to reveal subtle detail and natural tones while maintaining the dark, ethereal mood of the night.
2. Scout Your Foreground Mechanics Before the Shoot
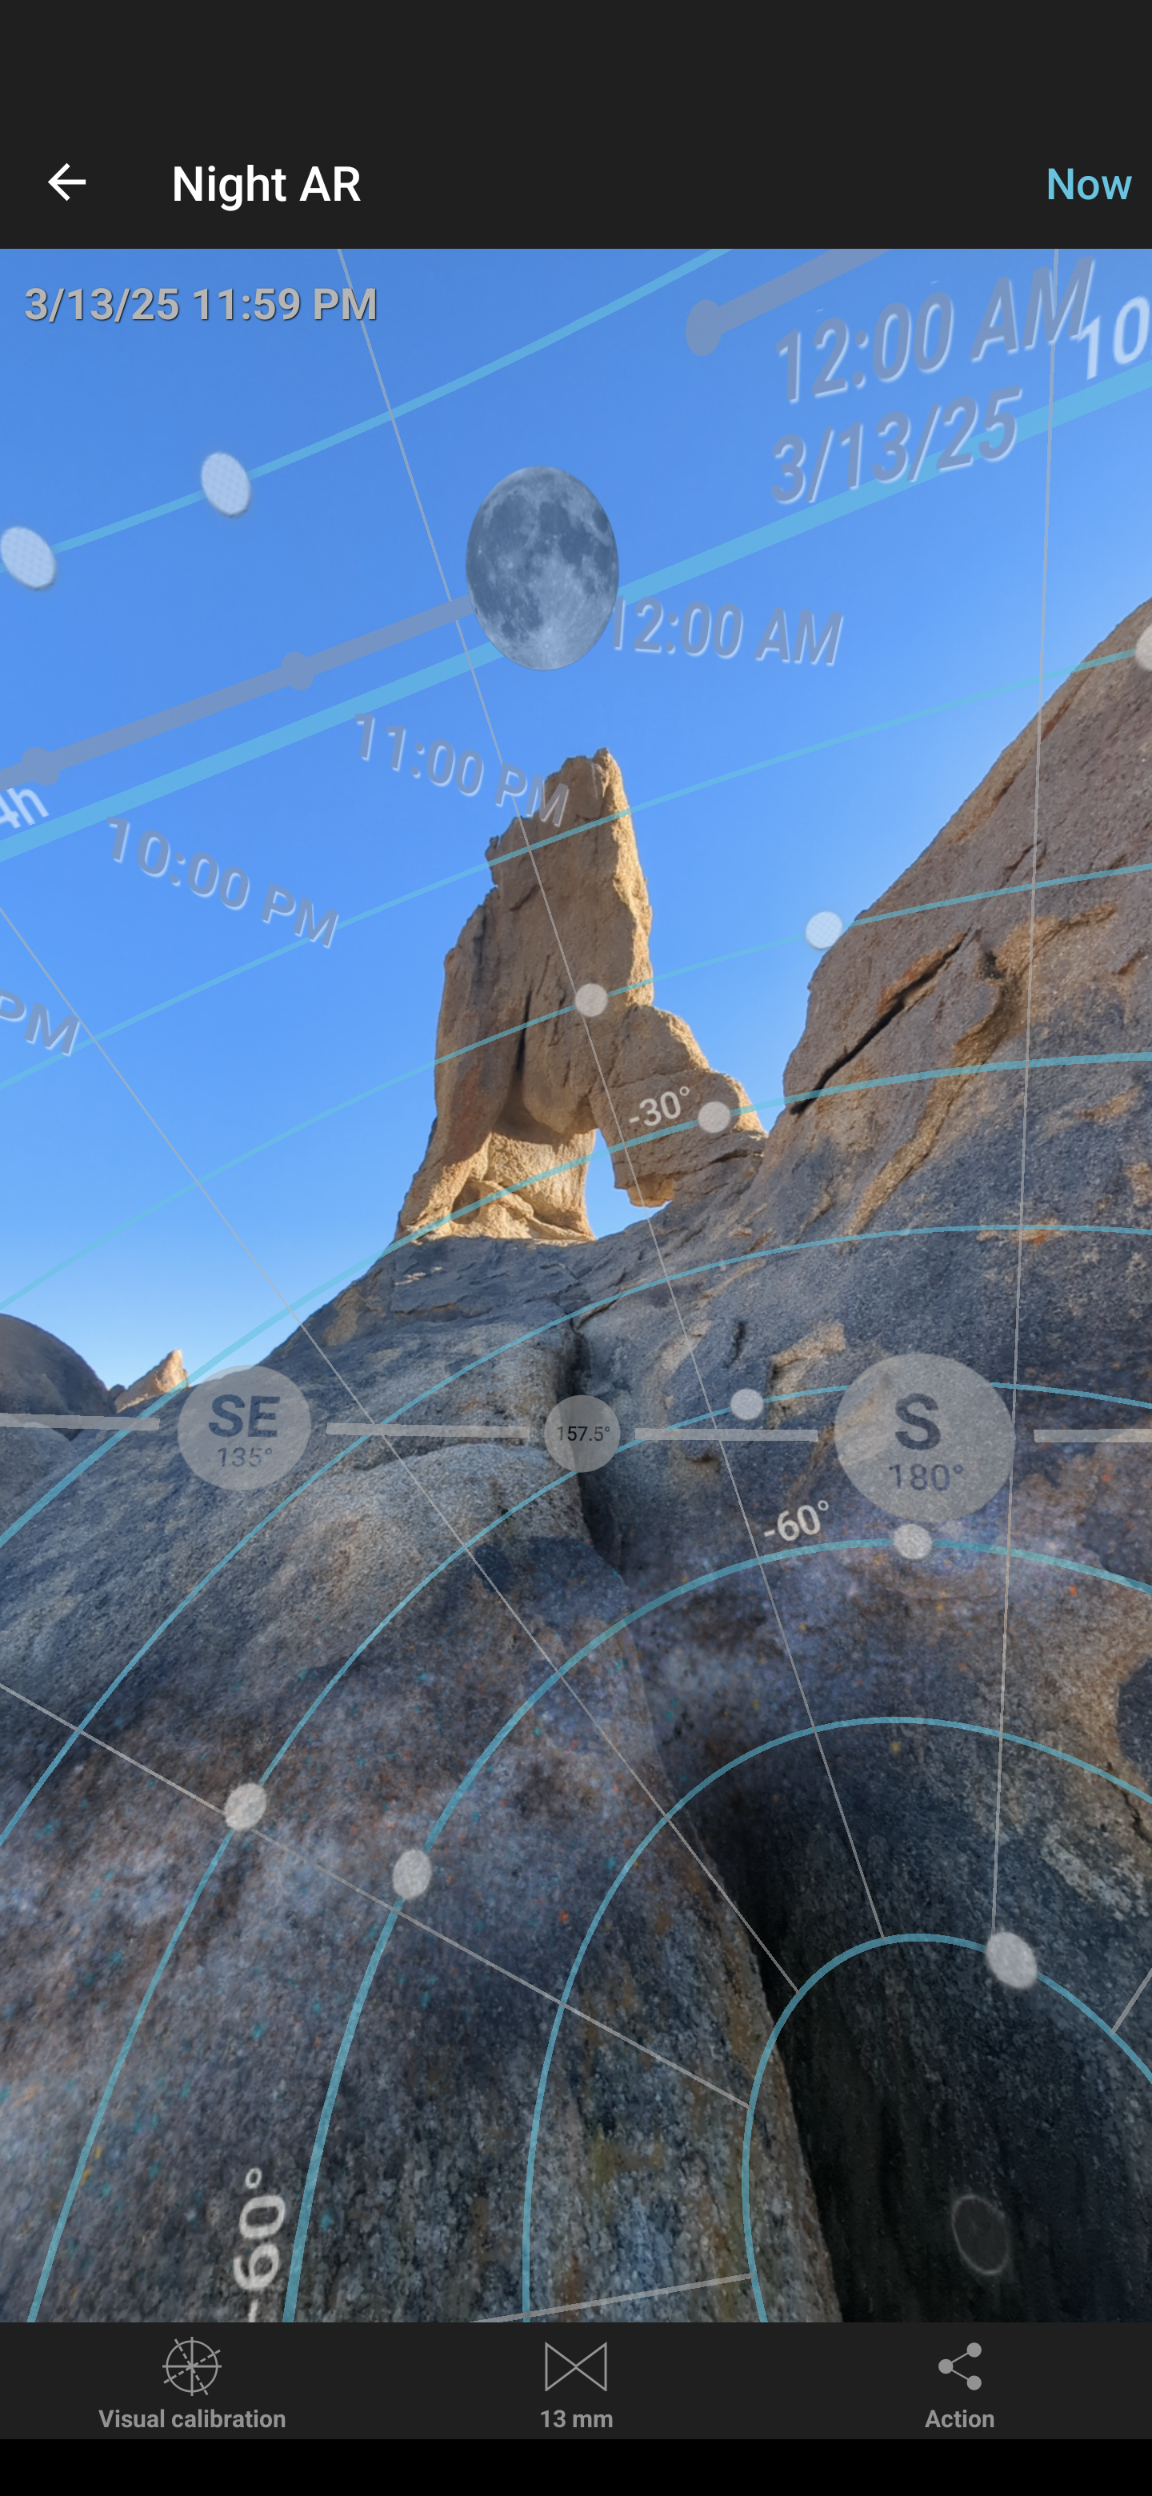
Daylight AR Scouting — Using PhotoPills Night AR mode to align celestial trajectories directly over foreground elements long before darkness falls. Taking field screenshots gives you an instant reference for the shoot.
A night photo without a strong foreground is just a scientific star chart. To build a compelling composition, your foreground element—whether it's a desert arch, an ancient Joshua tree, or a dramatic rock spire—needs to interact intentionally with the stars.
Scouting in total darkness is inefficient and often dangerous. Using digital planning apps like PhotoPills or PlanIt Pro lets you lock down your exact camera placements long before night falls:
Build a Seasonal Location Index: As you gain experience, you'll start mapping specific locations to specific months based entirely on how the sky moves. Wide-open desert basins work best in spring when the low, horizontal arch sweeps across the horizon (perfect for panoramas). Narrow canyons or tall rock towers shine in late summer when the core tilts vertically in the southwest.
Account for Seasonal Trajectories: Certain landscape features only line up during specific windows. A canyon opening due south frames the core brilliantly in early summer, but by September, that same canyon wall will obscure the core as it moves toward the southwest.
Use AR Mode in Daylight (and Save Screenshots): Walk your location during the day, open your planning app’s 3D Augmented Reality overlay, and look through your phone screen to see the exact path the Milky Way will take. Pro Tip: Take screenshots of your AR alignments in the field. Save them in your notes so you can reference them later that night—or use them to plan future trips years down the road.
Check Topographical Elevation: Pay attention to nearby mountain peaks, canyon walls, or ridge lines on your map. High terrain can easily hide the bottom half of the galactic core before it sets.
Map Out Multiple Compositions: Don't travel hours to a dark-sky spot just to take one photo and pack up. Flag two or three distinct compositions within walking distance during your daylight scout. Set a timeline: shoot your hero shot at 9:30 PM when the core aligns with a primary rock spire, then move to a secondary angle for a vertical alignment or star trails later on. During peak summer nights, you can easily pull off 3 to 4 compositions if your spots are close together!
3. Navigate Light Pollution & Atmospheric Light Domes
Even under a seemingly dark sky, regional artificial light pollution can ruin an otherwise perfect composition, turning delicate dark nebulae into a muddy orange glow.
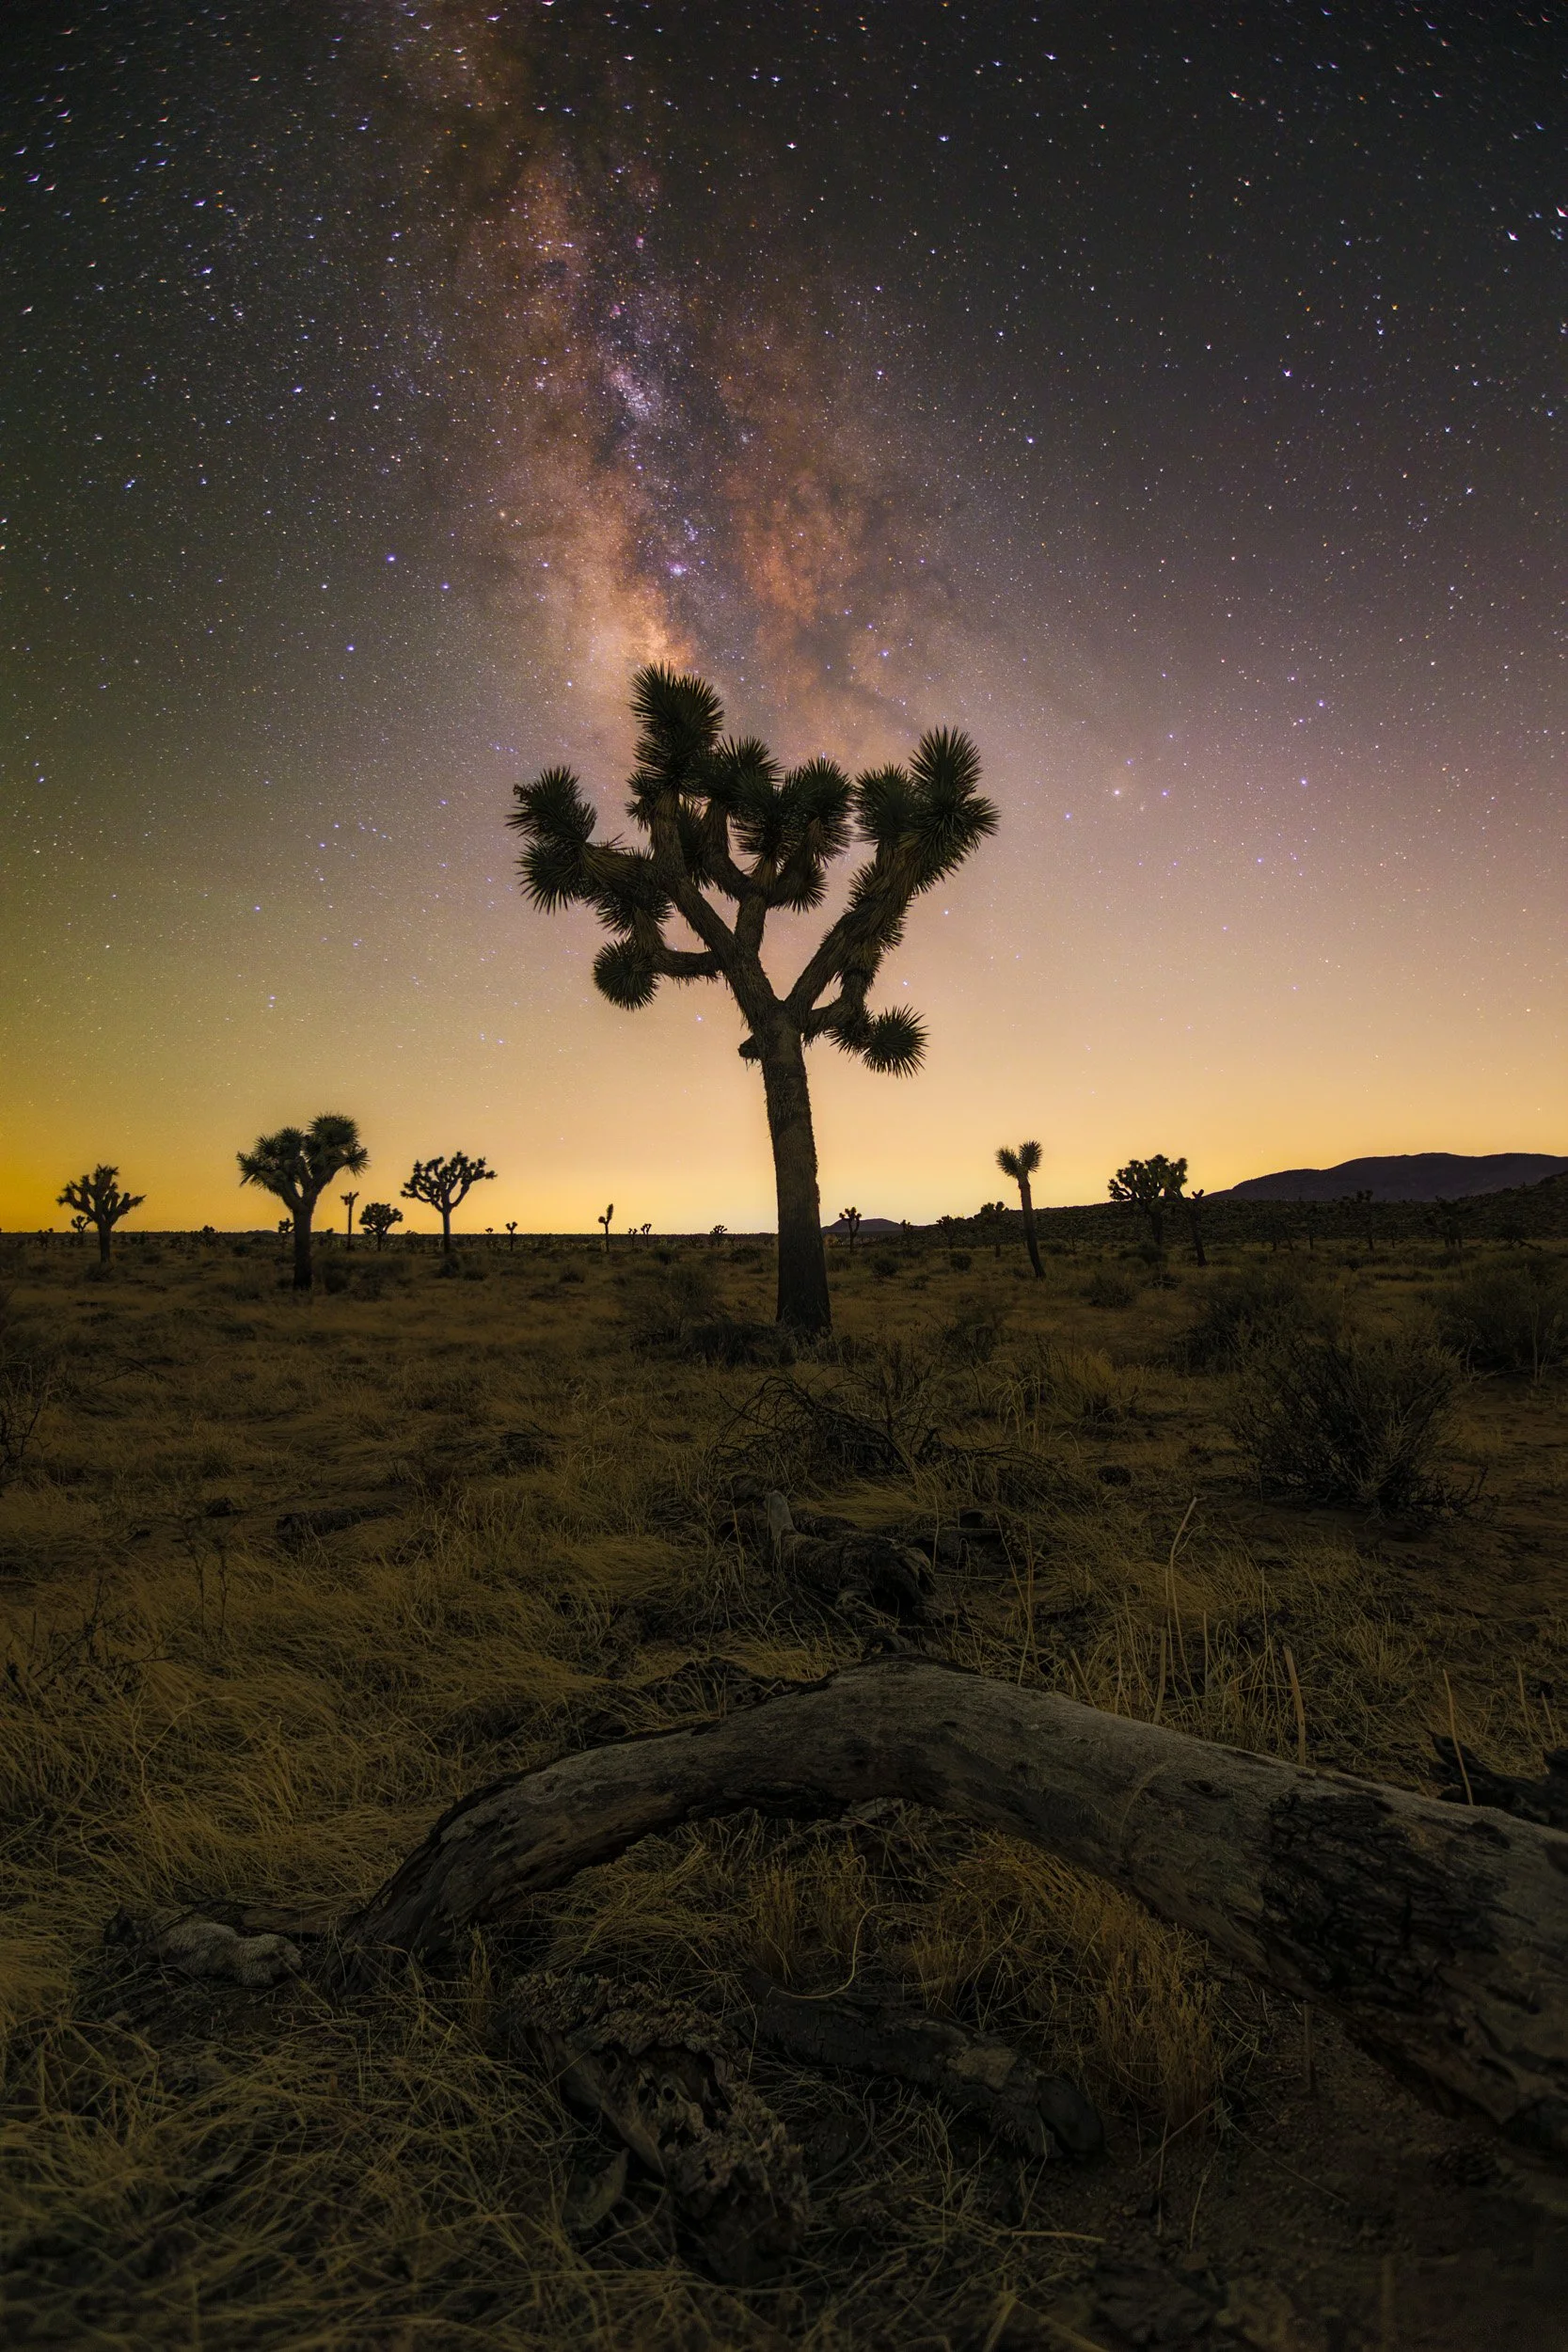
Joshua Tree Light Pollution — Urban growth in nearby desert cities creates a massive, bright light dome along the horizon that can easily wash out low-angle sky detail.
Don't Rely Solely on General Bortle Ratings: Light pollution maps (like LightPollutionMap.info or DarkSky.org) give overall ratings for destinations, but darkness varies wildly depending on your exact spot and camera angle. Joshua Tree National Park is a classic example: recent growth in the Palm Springs and Coachella Valley areas has steadily increased light pollution. The northern end of the park now suffers from significant light bleed, whereas the southern boundary remains much darker—especially in the spring. By summer, almost every area in Joshua Tree faces some degree of light pollution along the horizon if you're pointing toward the galactic core.
Identify Light Dome Trajectory (Position Yourself South): Cities up to 100 miles away cast massive light domes along the horizon that reach far into dark zones. In Death Valley, for instance, shooting east in the spring means contending with the persistent light glow of Las Vegas on the horizon. Later in the spring and summer, light domes from High Desert cities—and even the massive ambient footprint of Los Angeles—can still creep into your lower frame. Golden Rule: Whenever possible, position yourself south of major light pollution sources so you aren't shooting directly into an urban glow.
Build a Personal Light Pollution Index: Over time, keep track of how light domes interact with specific compositions during different months. Note factors like the core's azimuth, atmospheric moisture, and city locations. Knowing when an area offers a clean sky trajectory is just as vital as tracking galactic core visibility windows.
Use Light Pollution Filters Intentionally: While post-processing helps remove sodium-vapor tint, physical light pollution filters (like neodymium or clear-night glass) cut specific wavelengths of light pollution right at the sensor. This preserves crisp natural sky contrast and saves extensive work in post.
4. Forecast Microclimates, Transparency & Dew Point
Clear skies on your basic weather app do not guarantee clear skies for astrophotography. Standard consumer forecasts completely ignore high-altitude haze, smoke, ground-level moisture, and temperature shifts that can ruin an entire session.
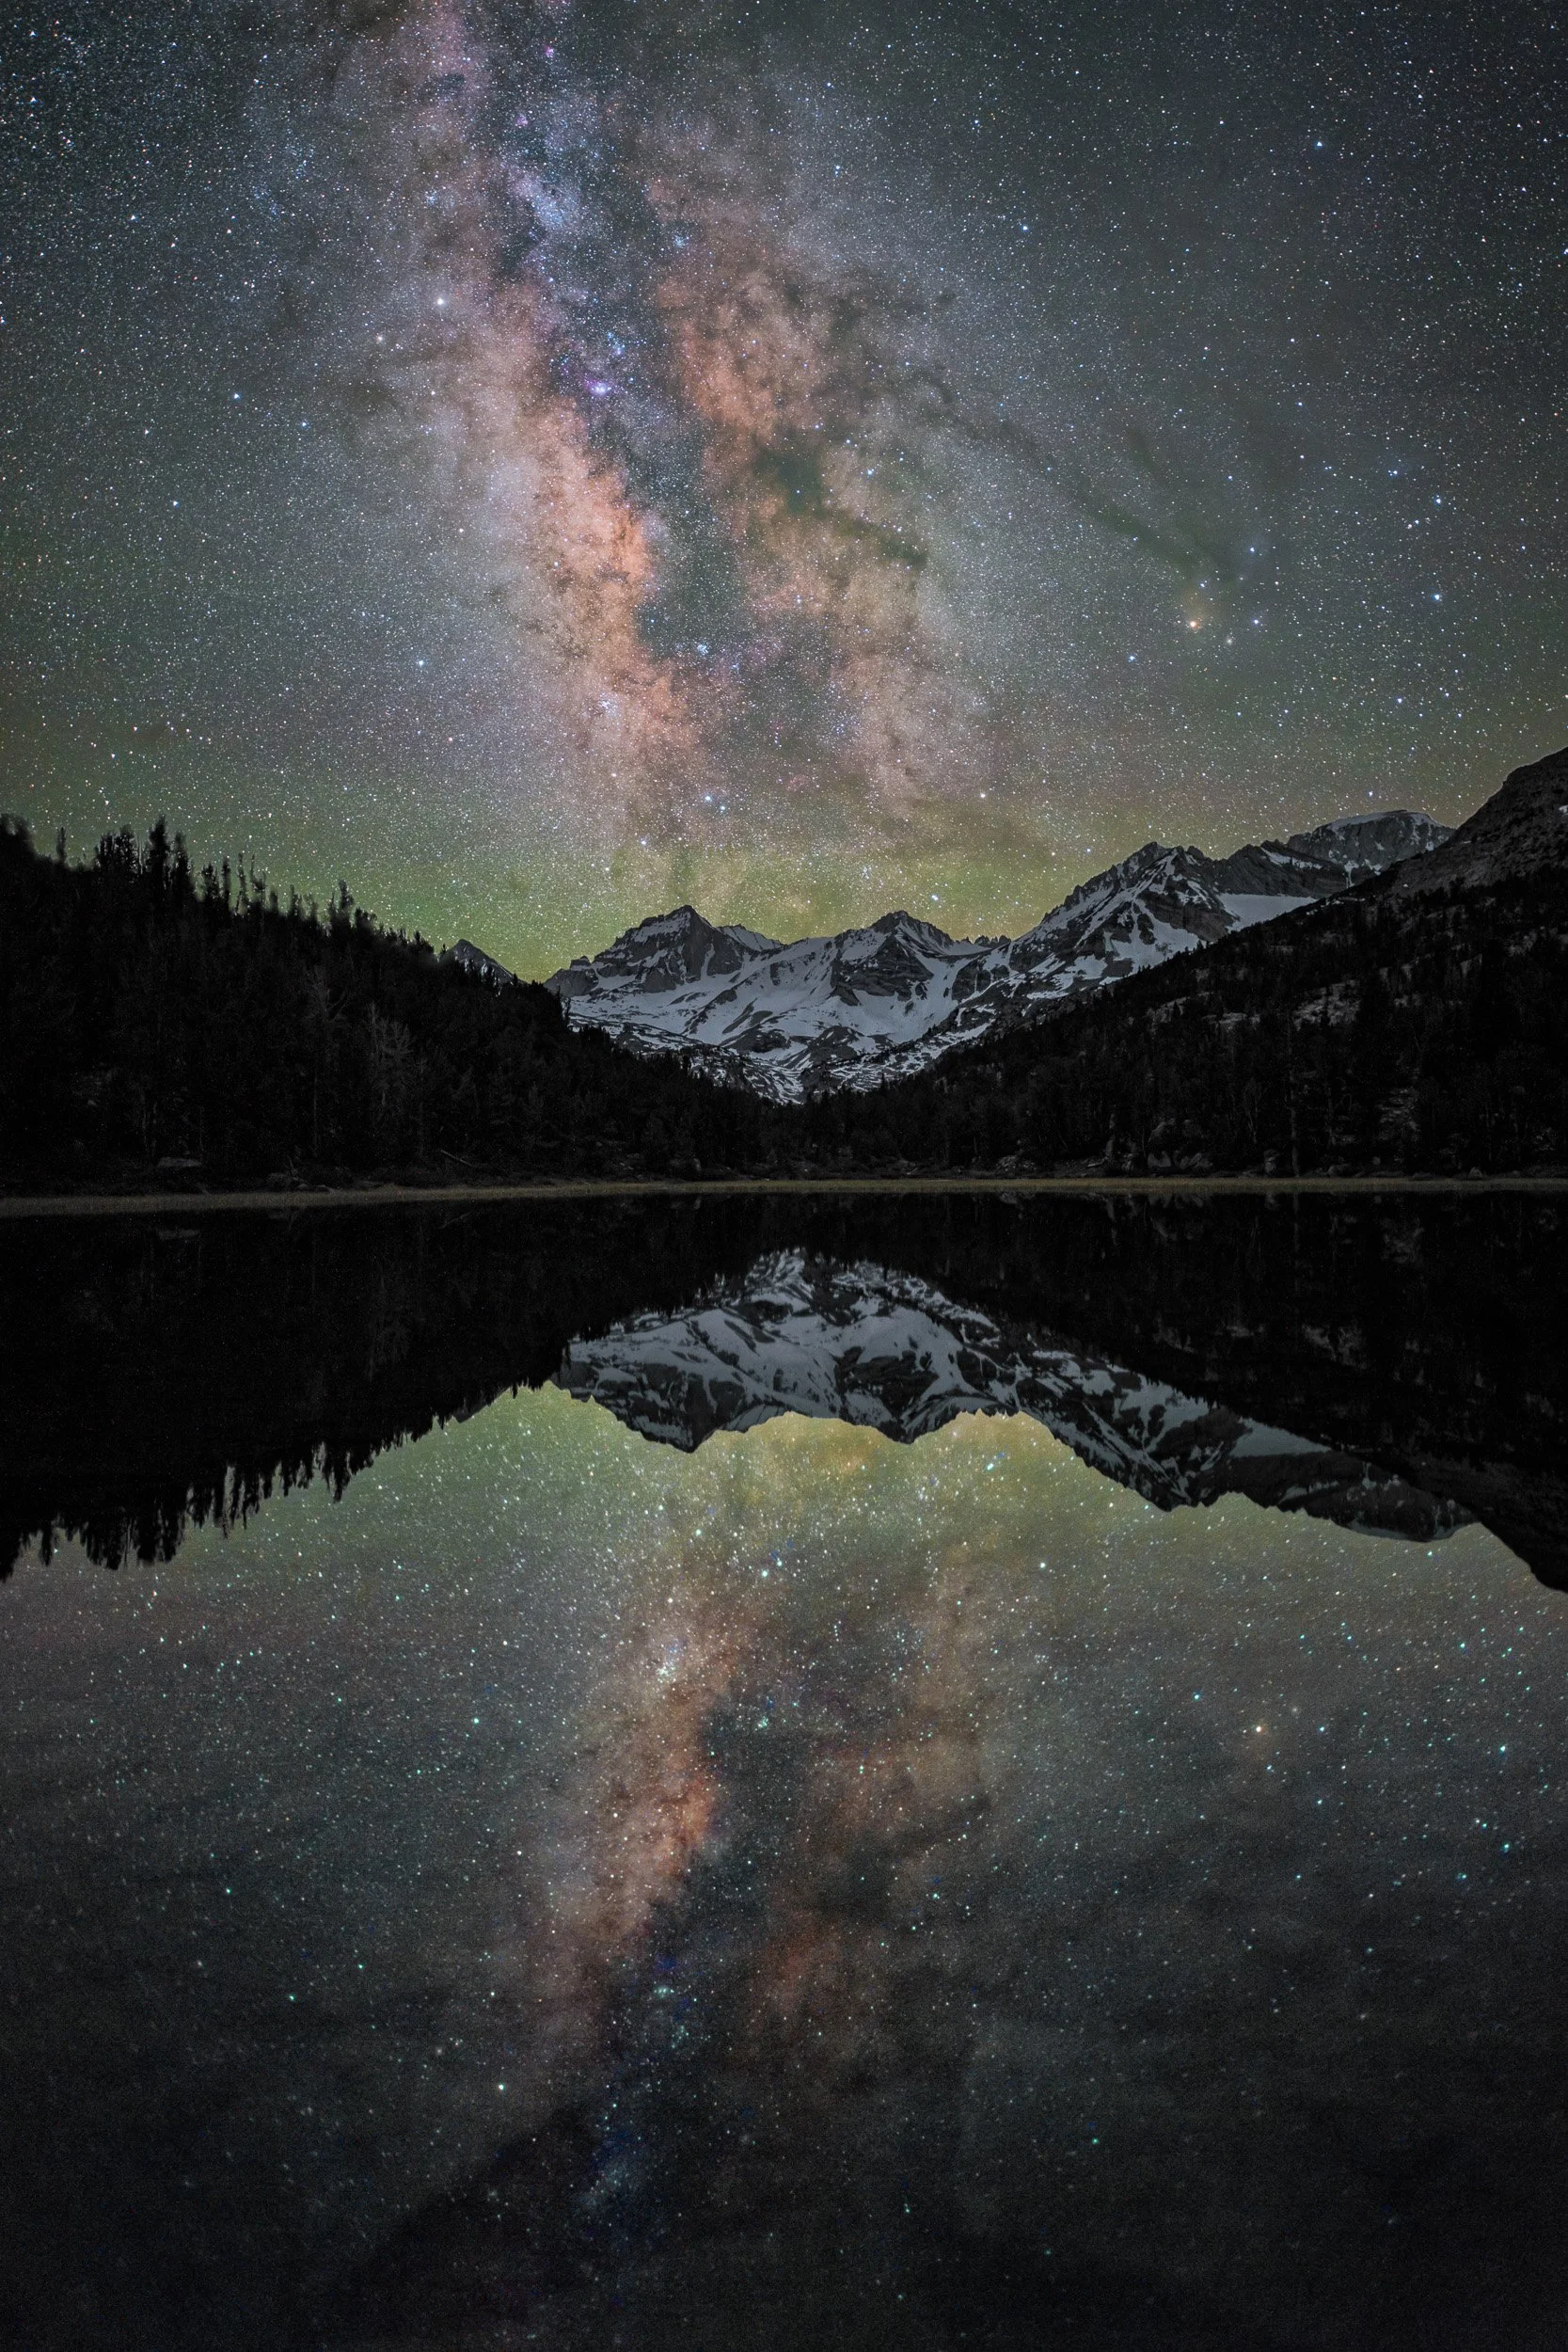
High-Altitude Eastern Sierra — Escaping summer desert heat by shooting at high elevation keeps sensor thermal noise low and yields crisp, tack-sharp star reflections on calm alpine lakes.
Ditch Basic Apps for Astronomical Forecasting: Specialized tools like Astrospheric or Clear Dark Sky break down three critical variables standard weather apps miss:
Cloud Cover Breakdown: Separates low, mid, and high-level clouds. High cirrus clouds are often invisible during the day but act like a sheet of wax paper over your lens at night, softening starlight.
Transparency (Dust vs. Marine Moisture): Measures how much atmospheric moisture, smoke, or dust will scatter starlight. This is critical whether you're shooting desert dust or coastal salt spray. California photographers love those rare coastal Milky Way shots over sea stacks, but high atmospheric humidity near the ocean often prevents stars from ever looking tack-sharp.
Seeing: Measures atmospheric turbulence. High turbulence makes stars flicker wildly and appear soft or bloated rather than sharp, pinpoint dots.
Account for Ground Wind & Surface Gusts: High night winds cause microscopic camera shake during long 15–30 second exposures, ruining tack-sharp star points. Wind also causes vegetation motion blur (ruining focus stacking efforts on desert plants or trees) and kicks up fine dust that destroys sky transparency. Check surface wind forecasts before heading out:
Field Tactics for Wind: Remove your camera strap (it acts like a sail in the wind), lower your tripod leg extensions, block gusts with your body, or weigh down your center column. If winds exceed 15–20 mph, pivot to sheltered canyon compositions or rock formations that block the prevailing wind.
Manage Ambient Temperature & Sensor Thermal Noise: High ambient night temperatures are a silent image killer. As your camera sensor runs long exposures in hot air, it heats up rapidly, generating severe thermal noise, heat haze, and ugly bright red/green/blue "hot pixels."
Hard Lesson Learned: Early in my astro-career, I made the mistake of shooting in Death Valley in the middle of summer. It was still 106°F at 3:00 AM, and every single photo from that night was choked with green sensor noise and unusable heat distortion.
To protect your images, save low-desert spots for early spring. In the dead of summer, head up to high-altitude locations like the Eastern Sierra, where night temperatures regularly drop below 50°F, naturally keeping your sensor cool and your images clean. When it comes to temperature, the colder the better, but I generally like it to be below 70°F at the very least.
Monitor the Dew Point Deficit (and Frost): Pay close attention to the gap between ambient temperature and the dew point. When the air temperature drops within 2–3 degrees of the dew point, relative humidity hits 100%, and water vapor condenses directly onto cold glass elements. In sub-freezing temperatures, that condensation turns into solid frost. Many photographers have permanently ruined lenses or lost hours of time-lapse sequences by leaving a rig unattended overnight without thermal protection.
Keep Lens Heat On Hand: Don't wait until your lens fogs up to act—once condensation or frost sets in, your shooting window is over until you dry the element. Wrap a USB-powered lens heater strap (or hand warmers secured with a heavy rubber band) around your lens barrel before the temperature hits the dew point to keep the front element slightly warmer than the surrounding air.
5. Build a Dynamic Contingency Matrix (Plans A, B & C)
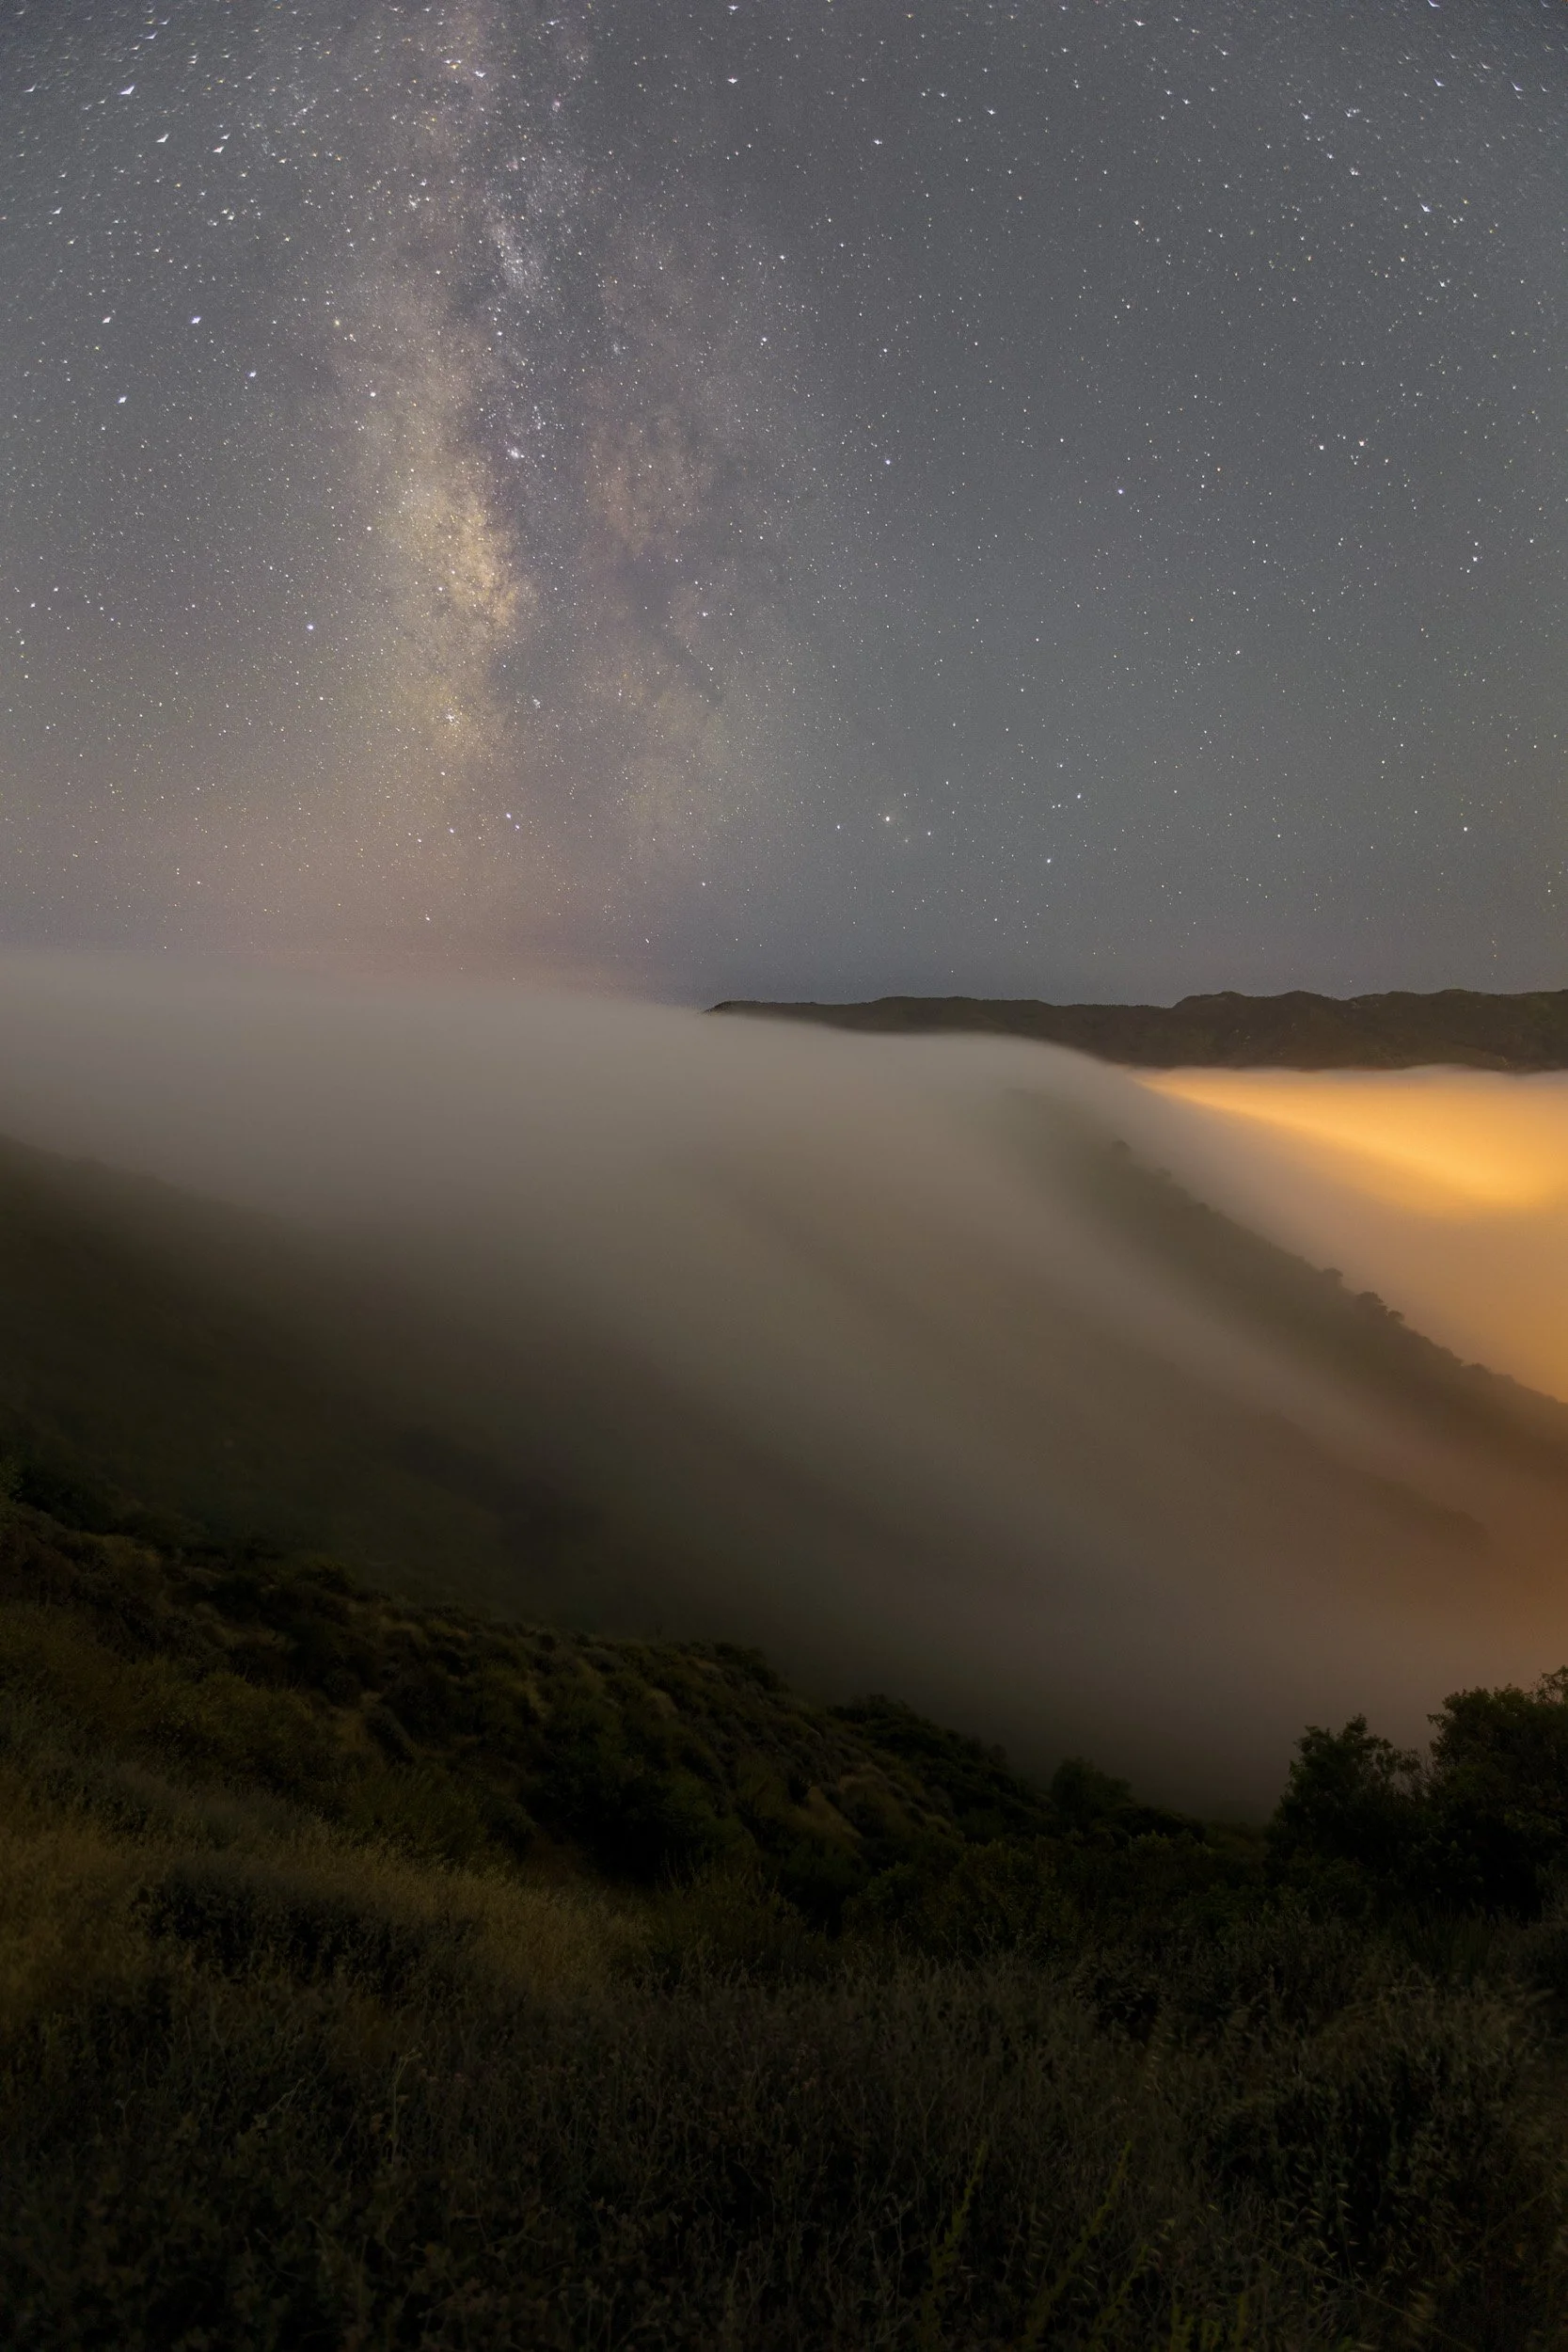
Pivoting Above the Marine Layer — When coastal fog rolls in, driving to higher inland elevations lets you shoot above the inversion layer, turning thick fog into a glowing, surreal foreground.
When balancing a full-time job or limited free days, you don't have the luxury of returning to a location night after night waiting for perfect conditions. Driving three hours to sit under a wall of sudden cloud cover or high-speed winds can ruin a rare free weekend.
Successful astrophotographers never head out with only one option—they build a flexible regional shooting strategy that lets them pivot on the fly based on live microclimate satellite updates.
Map Out Regional Fallbacks Within 1–2 Hours: Identify three or four distinct shooting zones within a reasonable driving radius of your main target. For example, if your Plan A is shooting Joshua Tree, set your Plan B for Anza-Borrego (different elevation and wind patterns), your Plan C for the Mojave National Preserve, and a Plan D for high-desert rock formations near Lone Pine.
Establish Microclimate Decision Checkpoints: Don't wait until you arrive at a fogged-in location to decide your next step. Set specific time intervals on your drive (e.g., 2 hours before astronomical twilight) to check live satellite imagery on Astrospheric or radar maps. If high cirrus clouds are rolling over Plan A, make an executive decision early to divert to Plan B where the sky remains transparent.
Pivot Compositions Based on Conditions: If cloud cover blocks the southern sky, don't pack up your gear and go home. Pivot your strategy:
Partial Clouds over Galactic Core? Switch to deep northern-sky compositions or star trails, where moving clouds add dynamic drama across long exposure stacks.
High Desert Winds ruining star sharpness? Move into a protected canyon or shoot low-angle foreground details where canyon walls shield your tripod.
Unexpected Marine Fog on the Coast? Drive inland over the coastal mountain ridge to shoot above the fog line, capturing the Milky Way resting over a sea of glowing clouds below.
The Night Sky Pre-Flight Checklist
Before heading out into the night, review these essential planning steps:
[ ] Is the moon phase compatible? Have I mapped out my dark-sky window—whether that’s a moonless phase, or using a low 10–25% crescent moon as a soft side-light for my foreground landscape?
[ ] Have I checked astronomical twilight? Do I know the exact hours when the sun dips past -18° for true, unwashed sky darkness?
[ ] Is my foreground pre-visualized? Have I checked the Milky Way's seasonal orientation (horizontal vs. vertical) and saved AR overlay screenshots for my 2–3 planned compositions?
[ ] Is my trajectory clear of light pollution? Am I positioned south of major light pollution sources like Las Vegas or Los Angeles?
[ ] Are sky conditions verified on Astrospheric? Have I confirmed clear cloud cover, strong transparency, low seeing turbulence, and ground winds under 15 mph?
[ ] Are ambient temperatures sensor-safe? Are night temperatures low enough to prevent thermal noise and hot pixels (avoiding 100°F+ desert heat)?
[ ] Is dew point management in place? Do I have USB lens heaters or hand warmers ready to prevent lens fogging or frost?
[ ] Do I have my Plans B, C, and D mapped out? Have I identified alternative regional shooting zones and established decision checkpoints to divert if microclimates shift?
Ready to Master Night Photography Live?
Theory is great, but executing in the dark with changing conditions takes hands-on experience.
📸 Private 1-on-1 Field Coaching: Work with me directly to master night-sky planning, camera setup, and post-processing. [Click here to book a private field coaching session].
🌊 Group Workshops & Masterclasses: Join a small group of passionate photographers under some of the darkest skies in the Southwest. [Click here to view upcoming workshop dates].